These Apple and Honey Oat Scones are fluffy and moist without being too dry. The perfect scones recipe!

Guys, it’s been a long week. I did my first recipe demonstration on Facebook Live (you can can catch my okay performance here, I need lots more practice!), my husband has been traveling (a ton), and baby teething is off the chains. I’m done. Put a fork in me done. Thankfully tomorrow is Friday and I cleaned my house today in preparation to do only fun things tomorrow.
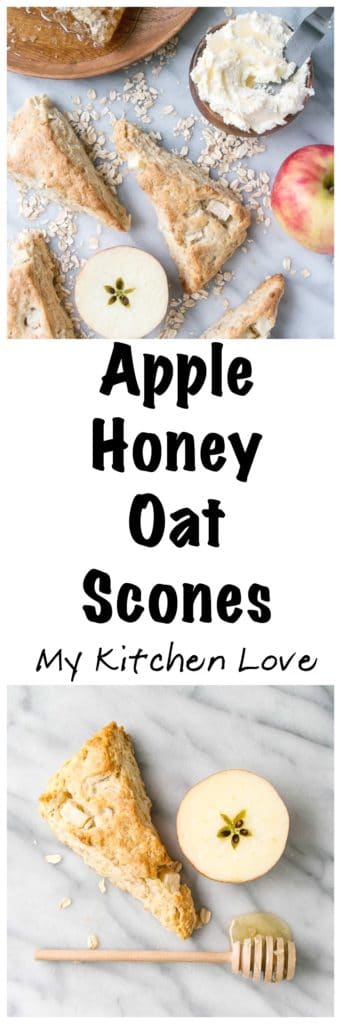
On that note, please let me know of any fun activities to do with 3 year olds (quietly indoors while baby is napping). These Apple and Honey Oat Scones came up as they are 3 ingredients we love and we needed some extra love. We eat apples almost everyday, and how great are honey and oats in baking? Waking up to warm scones on Monday morning really was a nice little extra we all needed.
These are the BEST fluffy and not dry scones I’ve ever eaten. You know what I mean right? Those scones that are so crumbly and dry that you have drink about 5 coffees to get them down? Hate those scones. These Apple and Honey Oat Scones are the fluffy and best scones you need in your life!
These scones are made from a technique I found in Sarah Kiefer’s “The Vanilla Bean Baking Book“. I stumbled across her scones section and made her Chocolate Orange Scones and I was floored. All the techniques make sense. How to fold the dough, how to cut the triangles so they’re more equal, freezing the dough to keep the butter solid (and therefore the scones more fluffy and less dry), brushing the tops so they brown properly without overcooking the scones.
It was as if all the intricate details of perfect scone making was opened to me. I’m excited about this, can you tell?

I whipped up some cream and added honey for a special touch to smear on top of these delightful baked goods. The honeyed whipped cream was a kick my kids loved.
They enjoyed it, umm, a little too much as I caught them eating the cream off the tops. Ha! I wish I could sometimes get away with that too.

You can see in the photo below the layers created in the dough from folding it. While there are a substantial amount of oats in this recipe, I kind of wished it was more “oat-y”. I love the nutritional boost oats gives a recipe like this, specifically the increase in iron and fibre, but I also like the way oats taste.
In summary if you don’t like oats very much, you probably won’t be able to tell they are there and if you love oats, you might end up wishing they were a bit more present.

Now that I’ve got this dreamy scone baking technique down, I can’t wait to explore new flavours, especially with Spring quickly arriving (hello rhubarb scones!!). I’d love to figure out a way to incorporate more whole grain flours like spelt or even buckwheat into scones. Do you have a flavour of scone you’d love to see?

- 1.5 cups all purpose flour
- 3/4 cup rolled oats
- 1 tbsp baking powder
- 1/2 tsp salt
- 1 medium apple peeled and roughly chopped (Granny Smith or Pink Lady preferred)
- 3 tbsp honey
- 1/2 cup whipping cream plus more for brushing on tops before baking
- 1 large egg
- 12 tbsp / 1.5 sticks unsalted butter chilled and cut into 1/2" pieces
-
Place oven rack in lower third of the oven and preheat to 400° F. Stack 2 baking sheets on top of each other and line with non-stick paper.
-
In a food processor (or a large bowl), combine flour, oats, baking powder, and salt. Blend or whisk to combine.
-
In a small bowl combine whipping cream, egg, and honey.
-
Add butter to food processor or large bowl and blend (using a pastry cutter if not the processor) until butter is coated in flour and about pea size. Add wet ingredients and chopped apple pieces. Stir until just combined with a spoon or a spatula.
-
Transfer dough to a lightly floured surface and knead until it comes together (and actually looks more like a proper dough). Roll the dough out into a 12" square and fold by the thirds (like a business letter). Fold into thirds again making a tall fat square. Place on a plate or another flat lightly floured surface and freeze for 10 minutes.
-
Remove from freezer and roll out again. Fold one more time into thirds an place seam side down. Gently roll into 12" x 4" rectangle. Using a knife cut crosswise into 4 equal rectangles (so into 4 rectangles 3" x 4" each). Cut each piece diagonally into 2 triangles. Transfer scones to prepared baking sheets.
-
Brush the tops lightly with whipping cream (lightly just the tops, not the sides).
-
Bake 20-25 minutes until golden brown on tops and bottoms.
-
Let cool for 10 minutes on baking sheet before serving.
Enjoy! xo

 Healthy Orange Creamsicles
