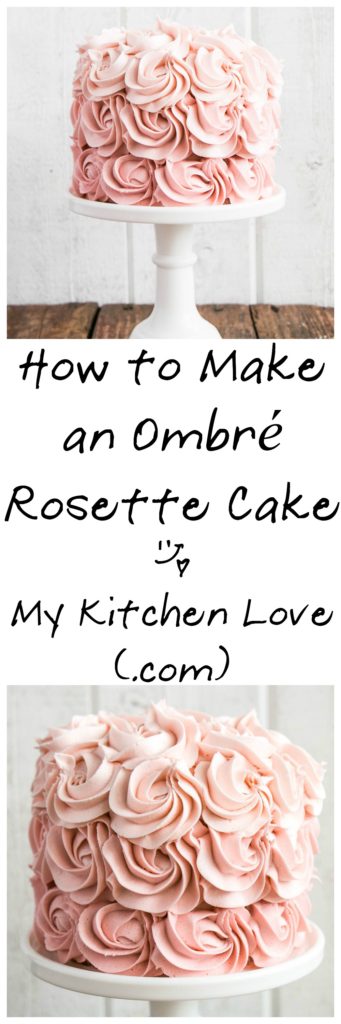
Tips on how to make an Ombré Rosette Cake (easily!).

I originally made a rosette cake for my baby girl’s 1st birthday party (photo here), which was a big success. Lucy adored the cake and everyone (read the adults) also loved the cake which was a Strawberry and Chocolate Ice Cream Cake.
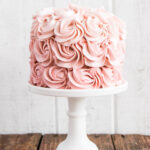
Most guests didn’t believe me when I said that I made it, which I’m taking it as a compliment! I made a second rosette cake, but ombré at the request of one of my friends for her daughter’s 2nd birthday.
The ombré cake did extremely well on social media (see here) and I wanted to share I how made the cake as I am definitely NOT a pastry chef, I have zero training (besides decorating cakes when I worked at Dairy Queen when I was a teenager and let’s be honest, I ate more than I decorated), and I found this project incredibly easy. Follow along in the post to see how this Ombré Rosette Cake came together.
First and foremost, I used my friend Olivia’s frosting recipe which can be found here, with some minor adaptations to suit my vanilla extract heavy hand. Olivia’s instructions are really great and if you’re not following her blog I’d highly recommend popping over for some serious cake envy. She was super patient about any questions I had regarding this cake! I don’t want to recommend the cake recipe I used shown in the photos since I wasn’t crazy about it.
I did love the cake for Lucy’s birthday and it was this Chocolate Cake recipe from a post I did over at Peaks & Harbours. I reduced the amount of coffee powder I used to 1/2 tsp (leaving liquids as is) and I used decaf since it was for a child’s birthday.
I ended up making 6 frosted cupcakes along with this cake since the cake shown here is a 3 layer 6″ and the cake in the P&H post is a 2 layer 8″. Make sure the cake is completely cool (chilled in the fridge for at least a couple of hours).

Frosting: use an icing colour gel such as Wilton brand. Gel food colouring is fairly widely available, I purchased mine at Superstore and Gourmet Warehouse here in Vancouver (no affiliation). Regular food colouring has quite a bit of liquid in it which changes the consistency of the frosting. Gel icing colour is also much more concentrated meaning way less is required; I use a toothpick to add it to my frosting.
Crumb coat: I used two different shades of frosting for the crumb coat since I’m not well versed in cake decorating, I wanted to ensure that I hide any possible gaps between the rosettes by having a matching crumb coat. The crumb coat or masking coat as I believe it’s technically called, should be thicker than a normal crumb coat. That means you shouldn’t be able to see most of the cake.
As Olivia mention’s in her post, the rosettes make a lot of frosting so you want a masking coat to “mask” any imperfections with the rosettes, but not so that everyone is only eating frosting and missing out on the cake portion.

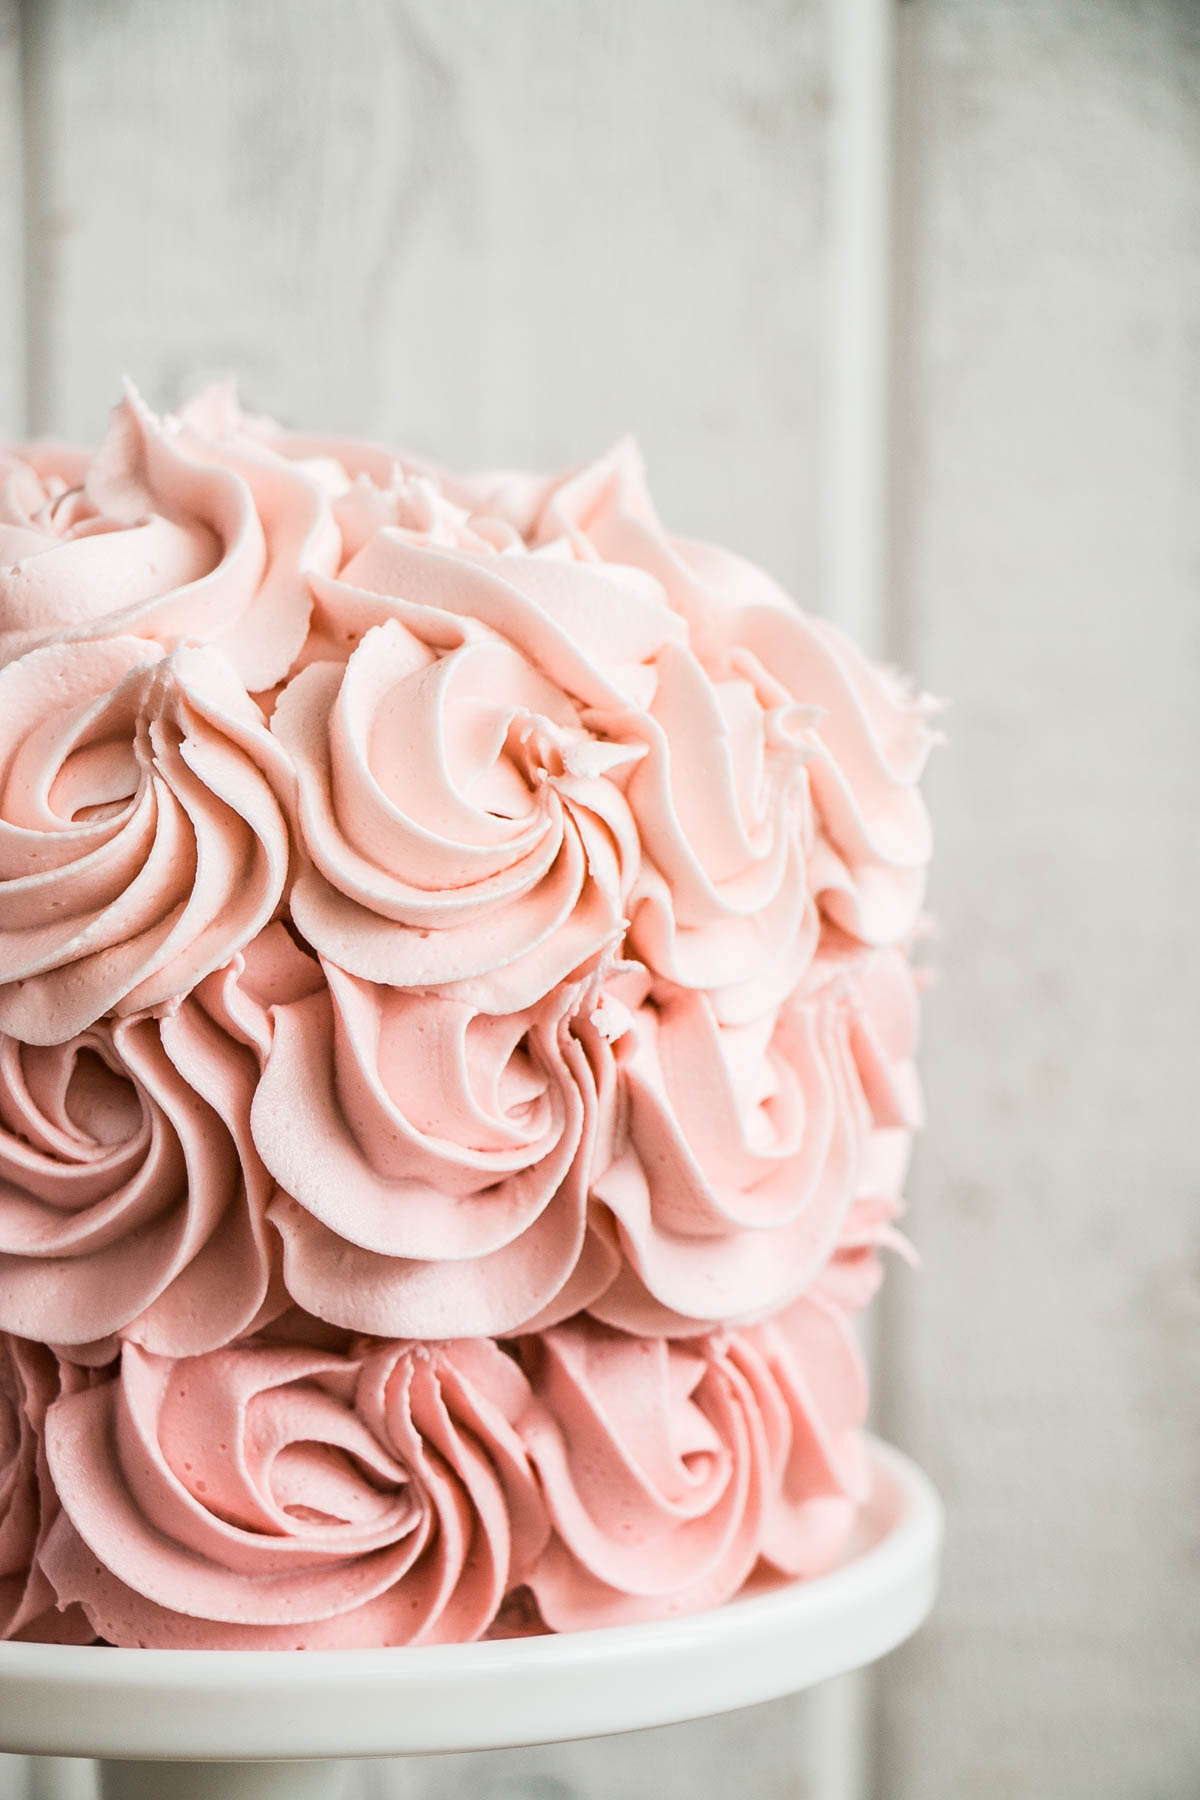
Rosettes: I’d recommend practicing a few on some wax or parchment paper (I scraped my practice rosettes back into the frosting bowl as the recipe just covered the cake). Be sure to go counterclockwise as well, for whatever reason, it makes the rosettes pop more from the cake.
It was a bit counterintuitive for me, but the rosettes should overlap, just enough to so that the masking coat is covered up. Try this in the practice round as well to make sure you’re happy with the layout. Start in the middle and then wrap around the middle for one full circle; moving at a continuous pace that allowed the rosette to build upward versus being flat was easiest.
When coming to the end of each rose, ease up on how much pressure is applied to the piping bag; you want the tip of the rosettes to flow into the circle and not come up into a firm point. Make sure there’s enough frosting in the piping bag before each rosette is commenced.

Equipment: the only equipment I used that I’d deem completely necessary is a 1M star tip decorating tool. I used Wilton brand. The smaller star tips won’t produce the beautiful curves and billowy look of the rosettes seen in this post (I tried it).
I used a piping bag, however a plastic freezer bag would work well also. I have zero other cake equipment. I don’t have a stand that spins, or anything fancy so this cake is very possible for cooks of any level!
Another great cake I’ve made for my kids is this Ice Cream Sandwich Cake. It was a huge success and is quite easy to whip up as well.
- 6 cups confectioners/icing sugar
- 2 cups butter at room temperature
- 2 tbsp vanilla extract preferably clear and that does say tablespoon, not a mistype
- 2-4 tbsp whipping cream I used 3
- Gel food colouring of choice I used "Rose Petal Pink" Wilton brand and decreased the amount of gel from bottom to top
-
Using a stand mixer with a whisk attachment, whisk butter until creamy.
-
Reduce speed to low and add in icing sugar 1 cup at a time until well blended.
-
Increase speed to med and beat until blended, about 2-3 minutes.
-
Add vanilla and 2 tbsp cream and continue to beat on medium for about 1 minute.Add more cream as needed until desired consistency is reached.
-
Continue to whip for 3-4 more minutes until frosting is completely smooth.
-
Divide into 3 separate bowls (giving 1 bowl a bit more as the top covers more ground). Add gel icing colour to each bowl until desired shades have been reached.
-
Frost on a cool cake using the methods described in the post above and chill.
Enjoy! xo


 In Crust We Trust – Pork, Apple and Ale Pie
It looks heavenly! I have loved this cake ever since I saw it on Instagram.
Xoxo
Mimi
You’re the sweetest Mimi! Thanks so much for stopping by and I’m looking forward to our n ext get together. xo
This is seriously SO stunning. The rosettes are perfect and I love the subtle ombre! <3 <3 <3 Thanks for the shout-out, so glad I could help! xo
Thanks Olivia! You’re the sweetest!
Absolutely beautiful presentation.
Thank you for your kind words!!
About how much gel did you put in each bowl? I’m about to do this for my daughter’s first birthday and I’m debating doing an ombre. Also, would you recommend two or three layers for a cake? I was considering doing a two tier.
Hi Ashley! If you’re set on ombre I’d do 3 tiers (the ombre will look better with 3 rows of rosettes). If you’re not probably 2 will suffice. I started off really lightly with the gel – even in the photos in the post I probably could have added a bit more. I used Wilton brand gel and I find I need to use more of it than other brands. That being said I added it with a toothpick a bit at time so I don’t have exact measurements. Sorry. Drop a bit in and give it a stir to see if you like it. I like subtle ombre, but it’s not for everyone.
Thanks for the reply. I love the subtle ombré too! How many layers of cake would you recommend if I’m doing a two tiered cake? 2 or 3?
Pleasure 🙂 3 layers of cake would be a good plan in my opinion. How wide are your pans? A 2 cake layer 8″ or 9″ is sufficient. If you do a more narrow cake (like shown in the photos of this post) a 3 cake layer would be more appropriate in my opinion, but it really comes down to the type of look you’re going for.
I think I have a 10” pan… so maybe a two layer would be sufficient. The frosting will probably look high enough, especially if I do two tiers.
It will look great. It will only be 2 layers of ombre then. You won’t be able to get enough height to do 3. Either way, it’ll be beautiful!
Thank you for all of the responses! You’ve been so helpful. One last question… in all honesty, should I just go for the three layers on each tier? I wasn’t sure if that would be too much cake lol or if you think it would be okay.
No problem! A 3 layer 10″ cake will serve around 20-25 people depending upon how you cut the cake. I’m weird. If I really wanted the ombre then I’d make it 3 layers. If you’re cool to skip the ombre and feel as though you might end up wasting some cake then 2 layers will be fine. All my photos are of 3 layer cakes that you see on the blog here.
PS – cake freezes well. Cut into slices, wrap in foil and place in a freezer bags 🙂
Hi i just made this cake..any idea why my roses slided downwards in the cake creating empty spaces just above the first row.. wish i can post my cake’s pic here for you to understand my issue
Hi! No worries. If the cake wasn’t cool enough it could cause the frosting not to adhere properly. I generally chill my cake in the fridge overnight before I frost it.
Hello your cake looks absolutely stunning.
I was wondering what color is your icing?
Hi Rona! Thank you. 🙂 It is a few drops of the “Rose Petal Pink” from Wilton (the icing colouring). Let me know if you have any more questions.
When you chill the cake, do you cover it up first before putting in fridge? If so, with what? if not, cool.
It depends. If the cake is going to be there for longer than a couple of hours, I will cover it. Usually I chill it overnight or I place it in the freezer for a few days or a week. In those cases I separate each cake piece with non-stick paper and wrap it in plastic wrap and place in large freezer bags or tupperware. I like storage containers and then it helps protect the cake pieces from other people jostling about in the fridge or freezer. Hope this helps!
Thank you a million!! I want to do rosettes on my birthday cake and I’m SO glad I found this article, your tips on piping the rosettes are super helpful. I think I would’ve jumped right in and messed things up. I have made multiple cakes but only done rosettes once, the frosting was too hard so it wasn’t easy to get the frosting to come out and it looked so inconsistent.
I wanted to do a cooked frosting recipe instead of buttercream (I think buttercream is too sweet and my family is not a fan) but do you think it would be too soft to hold the shape of a rosette?
Also I LOVED your ombré color! I know you used a gel from Wilton but do you have any suggestions on how to get a nice ombré like yours with food coloring?
Hi. I haven’t ever tried a cooked frosting before … so I can’t comment on that. I used a classic vanilla buttercream that sets well and has a good texture (not to mention it tastes delicious). I linked to the buttercream recipe I used (by LivForCake) and she has some great tips on how to get the consistency perfect and if I remember correctly, you can adjust the sweetness level as well.
Hi Sam, your cake looks delicious and I am trying this for my daughters first birthday… please could you recommend If the is needed in the evening by 6… when would be a good time to frost it and also … when can I prepare the icing ? Thanks udi
Hi Udi! I would frost the cake in the morning and leave it in the fridge if you have the space. If not, you could frost late in the afternoon and leave it at room temperature. Make sure the cake layers are completely cooled (pull them out of the fridge even for easier frosting). The frosting can be prepared up to 5 days in advance, but should be beaten with a mixer right before applying to the cake. Let me know if you any more questions. 🙂
Do you use regular whipping cream or heavy whipping cream for this recipe?
Hi Erica, I use 33% whipping cream. That’s what is available at my local grocery store. Let me know if you have any other questions 🙂
Your cook looks absolutely stunning! So stunning that I wouldn’t want to cut it to even eat it. Too good! I am beginner at frosting and just tried the recipe you have shared. I used icing sugar for the frosting and It has a slightly granular texture instead of being silky and smooth. Would you be able to guide me as to how to get the silky texture. Also it almost tastes like butter instead of the cream I have usually had on cakes. What do I do?
Hi Jasleen! If the icing sugar wasn’t mixed in enough it can leave a bit of a texture or you could try to sift it in next time. Also, I’ll confirm it’s powdered sugar you’re using (the super fine powdery white sugar). It is a buttercream recipe which is needed for a rosette cake so that the roses hold shape (the butter and sugar create a more firm texture than whipped cream). You could add a touch more vanilla and/or more icing sugar if you can taste the butter too much. Usually with 2 tablespoons of vanilla as per the recipe that’s all you can taste.
I love this cake! I am going to attempt it tomorrow for my daughters 4th birthday. Does the frosting recipe you have listed make enough frosting for the layers, crumb coat and rosettes? I saw in the blog you had a link to a frosting recipe and then also posted a recipe at the end so was a little confused. Thank you!!
Such a sweet cake for a 4th birthday – love that idea. Yes, I linked to a recipe that I adapted for this cake – giving credit where credit is due 😉 I had enough for the layers, crumb coat and rosettes and haven’t had anyone else mention the frosting quantity is lacking so you should be good.